SPECIFICATIONS
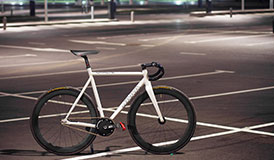
Bike
Frame :
2018 Jamis Renegade Exploit
Shifter & Brake :
Shimano 105
Crankset :
Shimano GRX 600 46/30
Derailleur & Cassette :
Shimano GRX 800, 11-32 cassette
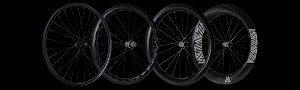
WHEELS
Rims :
Light Bicycle
AR36 Disc Hook Matte UD 24H
Tubeless-Ready
Hubs :
Novatec D411SB-CL / D412SB-CL hubs
Spokes :
Sapim CX-Ray
Nipples :
Sapim Polyax Securelock Brass
Tires :
Continental Gatorskins 32mm
The goal was to replace my alloy 35mm deep rim wheelset with disc brake hubs, with a carbon version.
After some encouragement from my cycling friends, and a bit of research on wheel building, I decided to
try my hand at building a carbon rim wheelset.
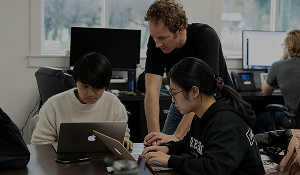
Luckily for me, I have access to some people who have experience in building at least a few wheelsets.
It is always comforting to know that if I have any questions, there’s someone I can turn to for
questions. And even if you don’t, there are many excellent resources for wheel building online. Do a
Google search and you will find informative pdf guides and YouTube videos to help you along the way.
One thing you need to do is to give yourself a lot of time to do this.
I spent an entire day just getting the wheels set up prior to the truing phase. There are 3 phases to
this project:
1) Wheel building information gathering and learning.
2) Component selection and assembly.
3) Truing and dishing.
Spend lots of time on phase 1 and gather as much information as you can about the hubs and rims and
spokes you are putting together. Get all your necessary tools and equipment prepared. You don’t want to
be in the middle of something and you realize you need a tool to do it.
Understand the process of assembling the wheel properly and be patient. The first wheel you build will
come with a learning curve, but the second wheel will go quicker. And you will come away with a new
perspective and appreciation about your wheels and your bike.
You will need to give yourself some slack because there will be a few hiccups along the way. That’s
normal.
Before you even start, make sure you order and receive the right components and get the correct spoke
length with the hubs you are using. The team at Light Bicycle is terrific. I knew the hubs I wanted to
use, so I asked them to ship me the right length of spokes and the rims I wanted to use. They took the
guesswork out for me and simplified my work.
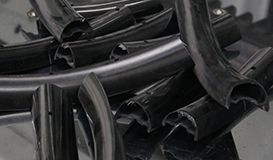
Once you are ready to start, get yourself organized and give yourself lots of room to work in so you are
not fumbling around. And with a few simple tips like using a spare spoke to thread the nipple onto a
spoke so you don’t drop the nipple into the rim, and having the right tools will make this phase go much
smoothly and efficiently, especially if you are a rookie. Don’t rush this part and pay close attention
to the pattern, as it sets you up for the truing and dishing part that comes next.

Phase 3 can be the most frustrating part of the build.
As you are not just making the wheel straight or true, but you are trying to keep the wheel round.
Again, take your time. Eventually, you will get it as close to perfect as possible. I have another set
of Light Bicycle wheels for this bike that I use for gravel, and they are perfect! Going through this
process really made me appreciate how well made Light Bicycle wheels are.
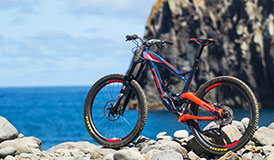
I compared the weight of the AR36
wheels and they are lighter by about 500g (1.0 lb). I use this set on my gravel bike when I ride it in
the city. I’ll be honest - I was a bit worried to ride on these wheels initially, only because I built
them myself, and it’s the first I’ve ever done. But on my maiden voyage, I rode over 50km and they
rolled smoothly, without any issues. My bike felt lighter and quicker. The ride was compliant and the
wheels were true.
These may be the first wheelset I’ve ever built up myself, but they won’t be my last!